

A 2023 Leapmotor C11 rolls into the bay with both low beams working and a milky band across the top of each lens. The owner has already paid for two polishes, and a third will not help — the damage sits in the hard coat, not in the surface film, and the part that fixes it is an assembly rather than a bulb. That is the practical reality of composite headlights: sealed optical units where the lens, housing, reflector and electronics succeed or fail together.
The short version: buy composite headlights on part number, configuration and connector — never on appearance. Two lamps can look identical and still differ in beam pattern, daytime running light signature, levelling motor, and pin count. None of those differences are visible until the bumper is back on and the fault code appears.
The sections below cover how these assemblies are built, which failures come first, what replacement versus restoration really costs, and the checks that stop a simple swap from turning into a second repair.
What a Composite Headlight Actually Is
The sealed-beam era kept things simple: a glass lens, a metal reflector and a filament were fused into one unit, and when the filament burned out the whole block was thrown away. Composite headlights separated those jobs. The assembly became a multi-part system that could be styled to the body line, aimed independently, and — crucially for modern vehicles — carry electronics.
Understanding the bill of materials explains most of the failure modes that follow.
Lens
Polycarbonate, typically 2.5–3.5 mm, with a UV-stabilised base and a hard coat measured in microns. The coating carries UV and scratch resistance; the polycarbonate carries impact resistance. Once the coat is gone, yellowing is a chemical process, not a stain.
Housing
Glass-filled PP or PA, welded or bonded to the lens, carrying the mounting bosses, the beam cut-off and often the bracket that takes the first hit in a low-speed bump.
Seal and breather
A butyl or silicone bead runs the lens perimeter, and an ePTFE membrane equalises pressure without letting water in. A blocked or missing membrane is one of the cheapest causes of a very expensive problem.
Light source
Either a replaceable halogen or HID burner in a socket, or LED modules with a driver board bonded to an aluminium heatsink. On LED units the driver is usually not serviceable on its own.
Optics
A faceted free-form reflector or a projector with a cut-off shield. The pattern is tooled into the part — it cannot be corrected by aiming alone if the wrong variant is fitted.
Controls
A levelling motor, sometimes an AFS swivel module, and on many Chinese-brand EVs a LIN or CAN link to the body controller. A missing module turns a bolt-on job into a coding session.
Where Composite Lamps Fail First
Contrary to how it feels in the workshop, impact damage is not the leading cause of replacement. Age-related degradation is. The distribution below reflects typical collision and wear repair work; the split shifts with climate, parking habits and vehicle age, so treat it as a planning guide rather than a fixed rule.
The practical consequence: a lamp that still lights up but has lost coating or taken on water will usually fail an inspection or a beam-pattern check before it fails electrically. Condensation that clears within twenty minutes of running is normal breathing; standing droplets or a tide mark across the reflector is a seal failure, and the reflector will corrode from the inside out.
Composite, Sealed Beam and Retrofit Compared
Buyers often cross-shop a factory-style composite assembly against a universal retrofit on price alone. The comparison below shows where the money actually goes.
Comparison of construction and service characteristics; type-approval requirements vary by market and must be confirmed against local lighting regulations.
Fitment: Five Variables That Decide Whether It Drops In
On Chinese-brand EVs the same nameplate often carries two or three lamp variants across a single model year. These are the differences that matter at the parts counter.
- Side. Left and right assemblies are separate part numbers and are not mirrored internally — the cut-off step is asymmetric.
- Year and facelift. A 21-model lamp and a 24-model lamp for the same car can share a silhouette and share nothing else; mounting tabs and connector position move.
- Configuration tier. High and low trim levels frequently use different internal hardware — matrix or projector modules up front, simpler reflectors below — and the DRL signature changes with them.
- Connector and pinout. Pin count and keying differ between halogen, HID and LED variants. Forcing a connector is how body controllers get damaged.
- Modules carried over. Levelling motors, AFS actuators and LED drivers are sometimes supplied with the lamp and sometimes not. Confirm before quoting, because transferring a module from a cracked housing is not always possible.
A well-organised catalogue saves most of this work, because the part number itself encodes model year and position — for example a left-hand lamp for a specific C11 build, or a right-hand high-grade lamp for a specific L7 variant.
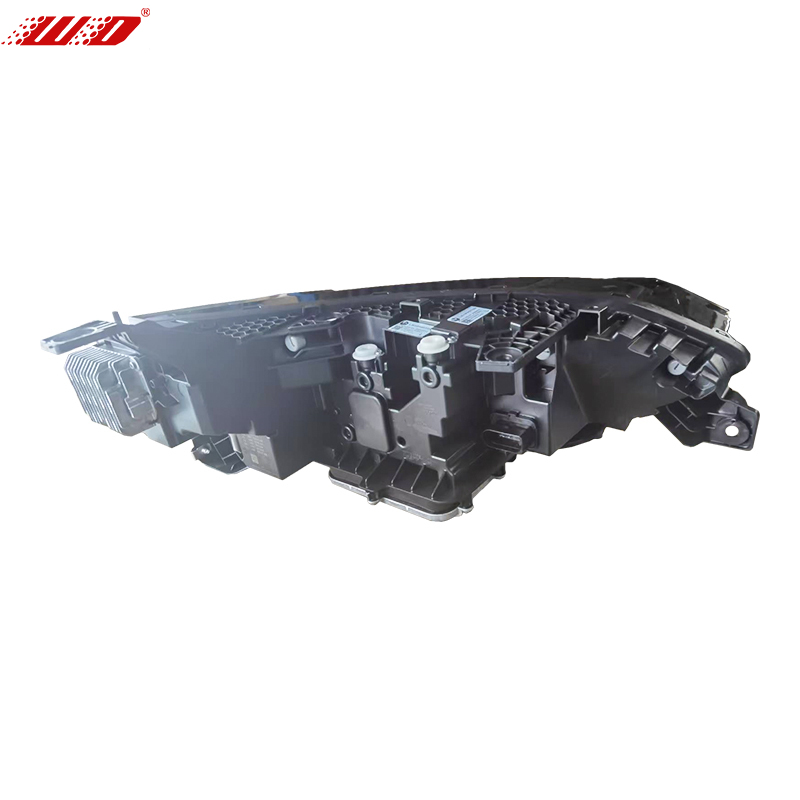 Leapmotor C11 Left LED Headlight AssemblyGenuine replacement left headlight assembly for the Leapmotor C11, listed by part numbers and using LED construction for direct replacement or lighting upgrade.View Product →
Where a brand covers several model years, it pays to browse by system rather than by picture: the Li Auto L7 electrical system listing groups lamps, cameras and harnesses by assembly, so the variant is confirmed before the order is placed.
 Li Auto L7 High-Grade Left and Right HeadlampsPair of replacement headlamp assemblies for the older high-grade Li Auto L7, with square plugs and listed left and right part numbers.View Product →
 ZEEKR 001 21Models Left and Right HeadlightsReplacement headlights for the ZEEKR 001 21Models, listed by left and right part numbers and featuring ADB adaptive high beam with intelligent zone lighting.View Product →
Restore, Repair or Replace: The Cost Arithmetic
Restoration is legitimate when the damage is confined to the coating and the reflector is intact. It is wasted money when moisture has already attacked the metallisation or the driver board is intermittent. The decision sequence below keeps that judgement objective.
Step 1 — Inspect inside, not outside
Look for a tide line on the reflector, clouding behind the lens, or a dark spot on the LED board. Any of these ends the restoration conversation.
Step 2 — Check coating depth
If polishing removes the remaining hard coat, the lens will re-yellow within a season or two unless a new UV clear coat is applied and cured.
Step 3 — Cost the downtime
A restorer may need the car for a day. A replacement assembly is typically a two-to-three hour job including bumper removal and aiming — often cheaper once labour and a second visit are counted.
Step 4 — Confirm the grade
Certification and grade claims decide resale value and insurance acceptance more than price does; the difference between OEM and aftermarket supply is worth understanding before signing off. This OEM versus aftermarket certification guide is a useful reference point.
Where the Demand Sits
Composite headlight demand tracks body style closely, because lamp size, LED count and integrated light bars all scale with the front end. In the Chinese-brand EV aftermarket, the split looks roughly like this.
The heavier concentration in SUVs and MPVs matters for stock planning: those front ends use larger lamps with more integrated light bars, which are more expensive to ship and more likely to arrive with damaged mounting tabs if packaging is weak.
Installation and Aiming, Step by Step
- Photograph the lamp, connector and bracket positions before disassembly. Masking tape on the bumper edge prevents paint damage during removal.
- Disconnect the 12 V supply. On high-voltage vehicles the lighting circuit is still 12 V, but body controllers dislike being probed live.
- Remove the bumper cover and liner fasteners in the sequence the manufacturer specifies — hidden clips at the wheel arch are the usual casualty.
- Release the lamp, disconnect the plug by the latch rather than by pulling the loom, and transfer any modules the new assembly does not include.
- Seat the new unit on its locating pins first, then tighten fasteners to the specified torque. Overtightening a plastic tab pre-loads the housing and cracks it later.
- Reconnect, test every function — low beam, high beam, DRL, indicator, levelling — and check for fault codes before refitting trim.
- Aim on a level surface against a wall or with an optical aimer, following the cut-off pattern for the market. Never aim by eye at night on the road.
Maintenance and Compliance Notes
Compliance is not a formality. Headlamps carry approval markings on the lens — an E-mark with a regulation number for markets following ECE rules, or the relevant SAE and DOT marking for North America. A lamp without the correct marking may pass a visual inspection and still fail a roadworthiness test, and it can void insurance on a claim.
- Wash with pH-neutral shampoo and plenty of water. Solvent-based cleaners and harsh degreasers attack the hard coat directly.
- Never polish a coated lens with an abrasive compound unless you intend to re-apply a UV clear coat afterwards.
- Check that the breather membrane is present and unblocked after any bumper repair; a missing membrane is a slow water leak.
- Record the part number and approval marking on the invoice. It makes warranty claims, resale and repeat orders straightforward.
- Store spare assemblies flat, in the original foam, away from sunlight — coated lenses degrade in storage as readily as on the car.
Get the part number, the configuration tier and the connector right, and a composite headlight replacement is a straightforward afternoon. Get any one of them wrong, and the most expensive part of the job becomes the second bumper removal.